


 Title Index
 Recently Changed
 Page Hierarchy
 Incomplete
 Tags
Tags


Tutorials > Working With EditableTables
Introduction
This article demonstrates the use of FogBugz Editable Tables and FogBugz Dialogs. These two namespaces, along with the more general FogBugz UI Elements contain a number of powerful classes that allow the plugin developer to construct a user interface that perfectly matches the rest of FogBugz. Javascript popup dialogs can be created in just a few lines of code. They automatically submit via AJAX in the background. Just specify the correct parameters to point them at your plugin raw page and handle the post there, making use of the API Request object.
Note: The classes are designed such that the easiest way to get FogBugz to produce the pop-up dialog html code for you is to use the CEditableTable. If you don't need the table and only want to create a pop-up dialog, see this article instead.
The code is well-commented, but here is an outline of the basic steps to use EditableTables and Dialogs:
-
Create an instance of CEditableTable
-
Define the cells of the header row with CEditableTable.Header.AddCell()
-
Create an instance of CDialogTemplate for each action you require (in this example, one each for edit, add new and delete)
-
Set the template instance to one of the available types: CSingleColumnDialog, CDoubleColumnDialog, CMixedColumnDialog
-
Set the properties of the CDialogTemplate.Template: sTitle, Errors (not covered in this example), sWidth
-
Add CDialogItems to the template with CDialogTemplate.Template.Items.Add()
-
Dialogs post in the background via AJAX to default.asp. Make sure to include hidden fields to specify that the post should go to your plugin raw page. Any easy way to add these fields is to run the PluginRawPageUrl() through UrlAsFormsFields():
CDialogItem.HiddenItem(Forms.UrlAsFormFields(api.Url.PluginRawPageUrl())
-
Most dialog items can be found in FogCreek.FogBugz.UI.Forms. Some examples:
- CDialogItem.HiddenInput() - An html hidden field
- Forms.DateInputString() - A standard FogBugz date text box with associated calender picker
- CEditableTable.DialogItemOkCancel() - Standard FogBugz OK and Cancel buttons
-
Note that the dialog template and the dictionary of data values to populate it are sent down to the client separately. An implication of this is that if you use a drop-down menu, as this example does, you must render your Forms.SelectOptions for each row of your data, including the selected value for that row. The template then includes a field {zooSelect} which is later replaced by the entire options html string.
-
Dialogs post in the background via AJAX to default.asp. Make sure to include hidden fields to specify that the post should go to your plugin raw page. Any easy way to add these fields is to run the PluginRawPageUrl() through UrlAsFormsFields():
-
Set the template instance to one of the available types: CSingleColumnDialog, CDoubleColumnDialog, CMixedColumnDialog
-
Loop through your data
-
Create each CEditableTableRow and add it to your table with CEditableTable.Body.AddRows()
-
Include links to your dialogs with the different flavors of CEditableTable.LinkShowDialog such as this one for a standard FogBugz edit icon:
CEditableTable.LinkShowDialogEditIcon(string sTableId, string sTemplateName, string sRowId, string sUrlNoJavascript)
-
Include links to your dialogs with the different flavors of CEditableTable.LinkShowDialog such as this one for a standard FogBugz edit icon:
-
Also put your data in a Hashtable and add it to any dialog templates with CDialogTemplate.AddTemplateData(). The data is not processed before populating the table, so make sure to HtmlEncode anything that might have come from a user.
-
Create each CEditableTableRow and add it to your table with CEditableTable.Body.AddRows()
-
Define cells of a footer row with CEditableTable.Footer.AddCell()
-
Add each of your dialog templates to by the names you used in your LinkShowDialogs with CEditableTable.AddDialogTemplate()
-
Define the cells of the header row with CEditableTable.Header.AddCell()
-
Handle the posted parameters from the dialog(s) in the RawPageDisplay() method of the IPluginRawPageDisplay interface.
-
Send back the XML version of the CEditableTable to be redisplayed to the user.
-
Set the response content type: api.Response.ContentType = "text/xml";
- Render the table: return KiwiTable().RenderXml(); // where "KiwiTable() is the method that generates your CEditableTable instance.
-
Set the response content type: api.Response.ContentType = "text/xml";
Notes
- Whenever your plugin uses the Request object, it should use a security action token to prevent cross-site request forgery (learn how to secure your plugin: Plugin Security)
- If your plugin creates tables in the database, see Implementing IPluginDatabase for information on requirements and usage.
- To keep things simple, it does not handle users who do not have javascript. To do this, simply build an interface for adding, editing and deleting kiwis and specify the url in CEditableTable.LinkShowDialogEditIcon in your CEditableTable.
Functionality
to enhance the Implementing IPluginDatabase kiwi zoo example by using a FogBugz look and feel and allowing editing of kiwis
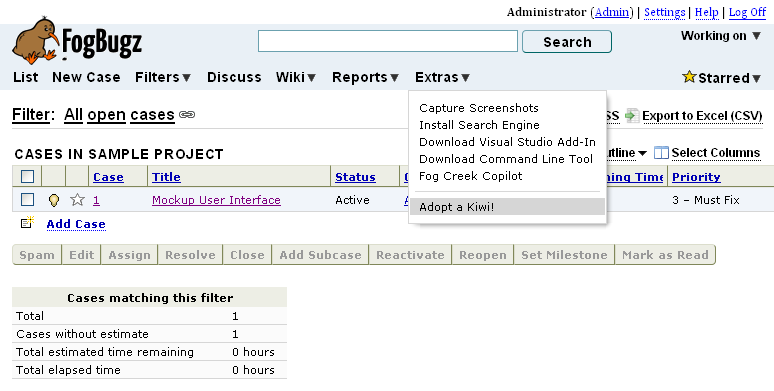
The kiwi zoo is accessible via a link in the extras menu, courtesy of IPluginExtrasMenu
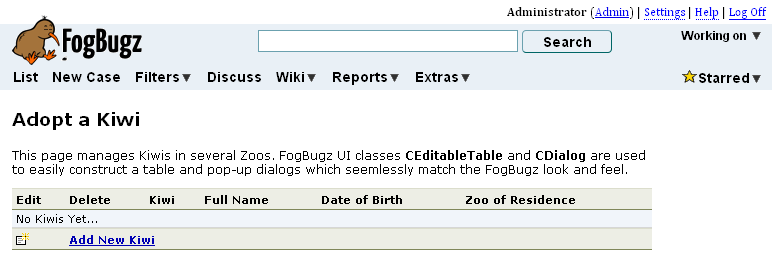
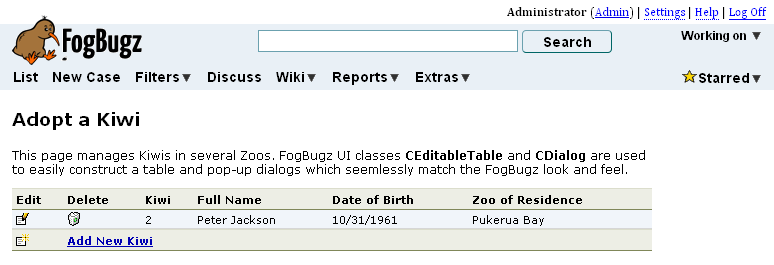
IPluginPageDisplay displays the current kiwis in the database via a CEditableTable. Initially there are none:
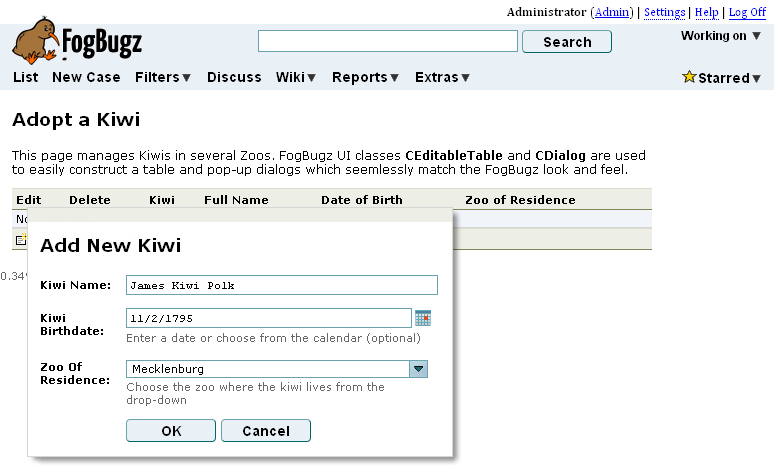
Clicking Add New Kiwi brings up a CDialog
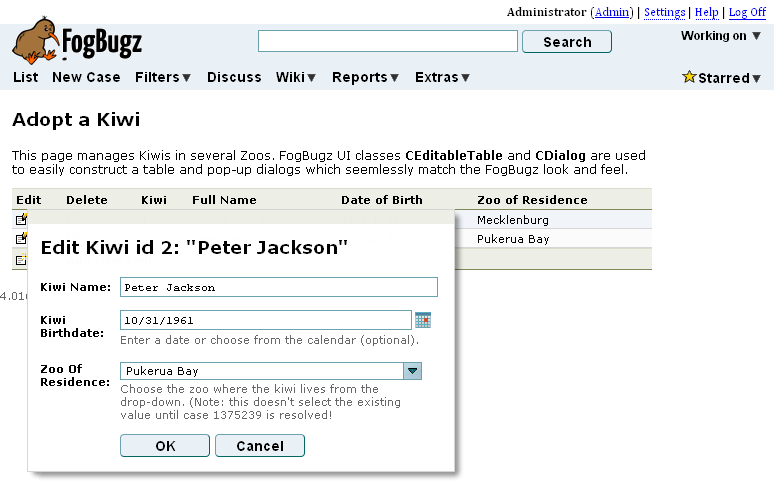
After adding several kiwis, clicking the edit icon next to one brings up another Dialog, with the kiwi's information pre-populated in the CDialogTemplate:
Likewise, clicking delete brings up a confirmation dialog
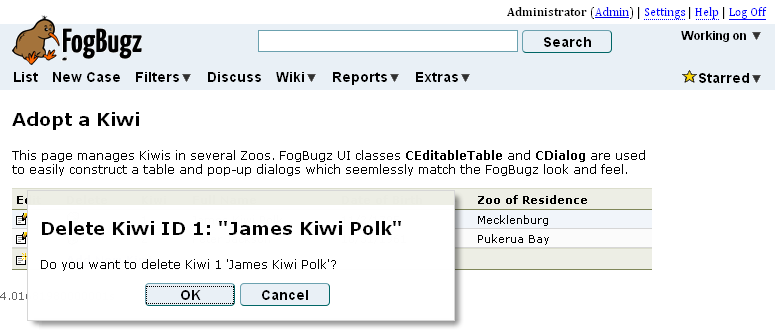
Clicking OK removes the kiwi from the database and from the CEditableTable via AJAX, without reloading the whole page. The AJAX is done by FogBugz, all you need to do is handle the requests to the page you specify (IPluginRawPageDisplay is good for this task).
Compile and Install It On Your Own
Download the source files:  EditableTable_Dialog_Example.cs
Then follow these instructions to create a functioning plugin assembly: Compiling and Installing a FogBugz Plugin
Next
Try out more tutorials here: Tutorials. Or find the interfaces you need to build that feature you've always wanted: FogBugz Plugin Interfaces