


 Title Index
 Recently Changed
 Page Hierarchy
 Incomplete
 Tags
Tags


Introduction
To write a plugin which manipulates wiki pages (CWikiPage) and inserts some custom html dynamically into them, you can implement interfaces to hook into the display of the page, the commit action when the page is edited, and join custom data to the page. This leaves you with a lot of work to parse the contents of a page, insert or replace some html, add links to the insert and/or context menus and create dialogs to provide a UI to the users. In most cases, you can achieve all this with a lot less code at a higher level with the WikiBlock.
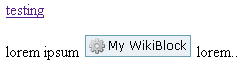
WikiBlock encapsulates a bunch of code into a couple of easy-to-use classes. Implementing a WikiBlock allows you to create a widget that can be inserted in a wiki page. This widget can have settings you define, and the WikiBlock classes take care of rendering a nice popup dialog, creating placeholders in the wiki page for each instance of your WikiBlock, and then rendering the block in either edit or view mode. Any WikiBlocks you define will automatically show up in the insert menu with the name you specify. When one is inserted in edit mode, a box is shown as a placeholder. You can set the text statically or on the fly:
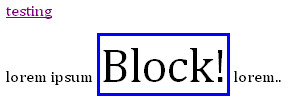
Behind the scenes, wikiblock has put an html hidden input tag in the body of the page, with any parameters that pertain to that instance. When the page is viewed, it replaces that input tag with whatever you specify in the method ViewHtml():
Getting Started
A wiki block plugin is composed of (at least) two classes:
- A class inheriting from FogCreek.Plugins.Wiki.WikiBlockPlugin
- At least one class inheriting from FogCreek.Plugins.Wiki.WikiBlock
These classes are located in their own assembly (.dll) file which you must reference (see #4 under "Setup Your Project" below). The WikiBlock class(es) that you define are what actually generate content within a wiki page, while the WikiBlockPlugin class acts as a manager that keeps track of which wiki blocks are associated with a given block identifier. Multiple WikiBlock classes can be assocaited with a single WikiBlockPlugin class so that more than one wiki block can be included in a single assembly (project).
Setup Your Project
- Follow the steps in A Quick Start Guide to setup a Visual Studio project. Give your project a name, e.g. MyWidget (all further examples in this article will use this name).
- Name your C# file MyWidgetPlugin.cs
- Add a new class file and name it MyWidgetBlock.cs
-
As mentioned in the Quick Start Guide, add a reference in both files to
path/to/fogbugz/PluginUtils/bin/FogCreek.Plugins.Wiki.dll -
In both files, add a directive for the Wiki namespace
using FogCreek.Plugins.Wiki; -
Create your WikiBlock class in MyWidgetBlock.cs
See "Create Your WikiBlock" below -
Create your WikiBlockPlugin class in MyWidgetPlugin.cs
See "Create Your WikiBlockPlugin" below -
Optionally create a third class for a WikiBlockManager in MyWidgetManager.cs
See "Create A WikiBlockManager" below
Create Your WikiBlock
-
Make your class inherit from WikiBlock:
public class MyWidgetBlock : WikiBlock - Place your cursor inside "WikiBlock", hit Shift-Alt-F10 and then 'a' to create the method stubs that you will need to implement
- Implement the ViewHtml method stub (returns the view mode HTML representation of your wiki block)
-
Add the following constructor
public MyWidgetBlock(CPluginApi api, Hashtable dictAttributes) : base(api, dictAttributes)
{
}
Create your WikiBlockPlugin
This class serves only to register (each of) the WikiBlock(s) you created above.
-
Make this new class public and inherit from WikiBlockPlugin
public class MyWidgetPlugin : WikiBlockPlugin -
Add the following constructor:
public MyWidgetPlugin(CPluginApi api) : base(api, new MyWidgetManager(api))
{
} - The second argument, for a WikiBlockManager is optional. It is only needed if you want to override the methods that display the page and the wikiblock. See "Create a WikiBlockManager" below
-
Register your WikiBlock(s) in the constructor replacing "mywikiblock" with a unique (within your plugin) identifier for this wikiblock, and the name of the class for the wikiblock, in our example, "MyWidgetBlock":
AddWikiBlock("mywikiblock", typeof(MyWidgetBlock));
Create a WikiBlockManager
The WikiBlockPlugin class delegates most of the real work to an instance of WikiBlockPluginManager. To customize how your wiki block plugin works, create a new class that inherits from WikiBlockManager:
public class MyWidgetManager : WikiBlockManager
{
public MyWidgetManager(CPluginApi api) : base(api)
{
}
public override string WikiPageDisplayView(CWikiPage oPage, string sContents)
{
}
protected override string RenderWikiBlock(WikiBlock block, RenderingMode mode)
{
}
}
Make sure to specify your WikiBlockManager (here, "MyWidgetManager") in the constructor in your wiki block's WikiBlockPlugin class:
public class MyWidgetPlugin(CPluginApi api) : base(api, new MyWidgetManager(api))
{
}
Note On Timezones
DateTimes in a WikiBlock class will always be treated as server-local FogBugz time. Even if you initialize a DateTime object to a specific UTC date/time, it will be loaded as if it were a date/time in the FogBugz time zone. Use the Time Zone methods to convert between server, UTC and client timezones.
Full List of Execution Paths
Examples
Confused yet? Start by implementing a very simple example.
Intermediate WikiBlock Example slightly more complex